Continuing
One of the things I’m working on learning is Morse code. Most amateur radio operators call it CW for continuous wave, because when your radio is transmitting it is a single continuous wave of one frequency. Unlike most of the voice modes which modulate the wave in some way, CW is not modulated except to turn it on or off. I found a good YouTube channel called HamRadioDuo which explains how to learn CW, and they list a lot of good resources to learn. In a recent video they showed a website called VBand and another called Vail, which are like a radio repeater but on the internet and only for CW. They also made their own chatbot that you can talk to with CW. The only issue is that doing CW with a keyboard is hard, and you need some sort of adapter to hook up your CW paddle to a computer. I want to play around with the chatbot in particular, but I need to get an adapter to do it without getting too frustrated.
Existing solutions
The VBand website sells an adapter for $25 plus $5 shipping, which is totally reasonable for an assembled electronic gadget with a plastic case. The Vail developer has open sourced their solution, so if you wanted to build your own adapter you could do so. I didn’t have one of the particular microcontrollers lying around, but I did look at the code. It looked overbuilt and had a lot of features I don’t think I need just to try out the system.
My solution
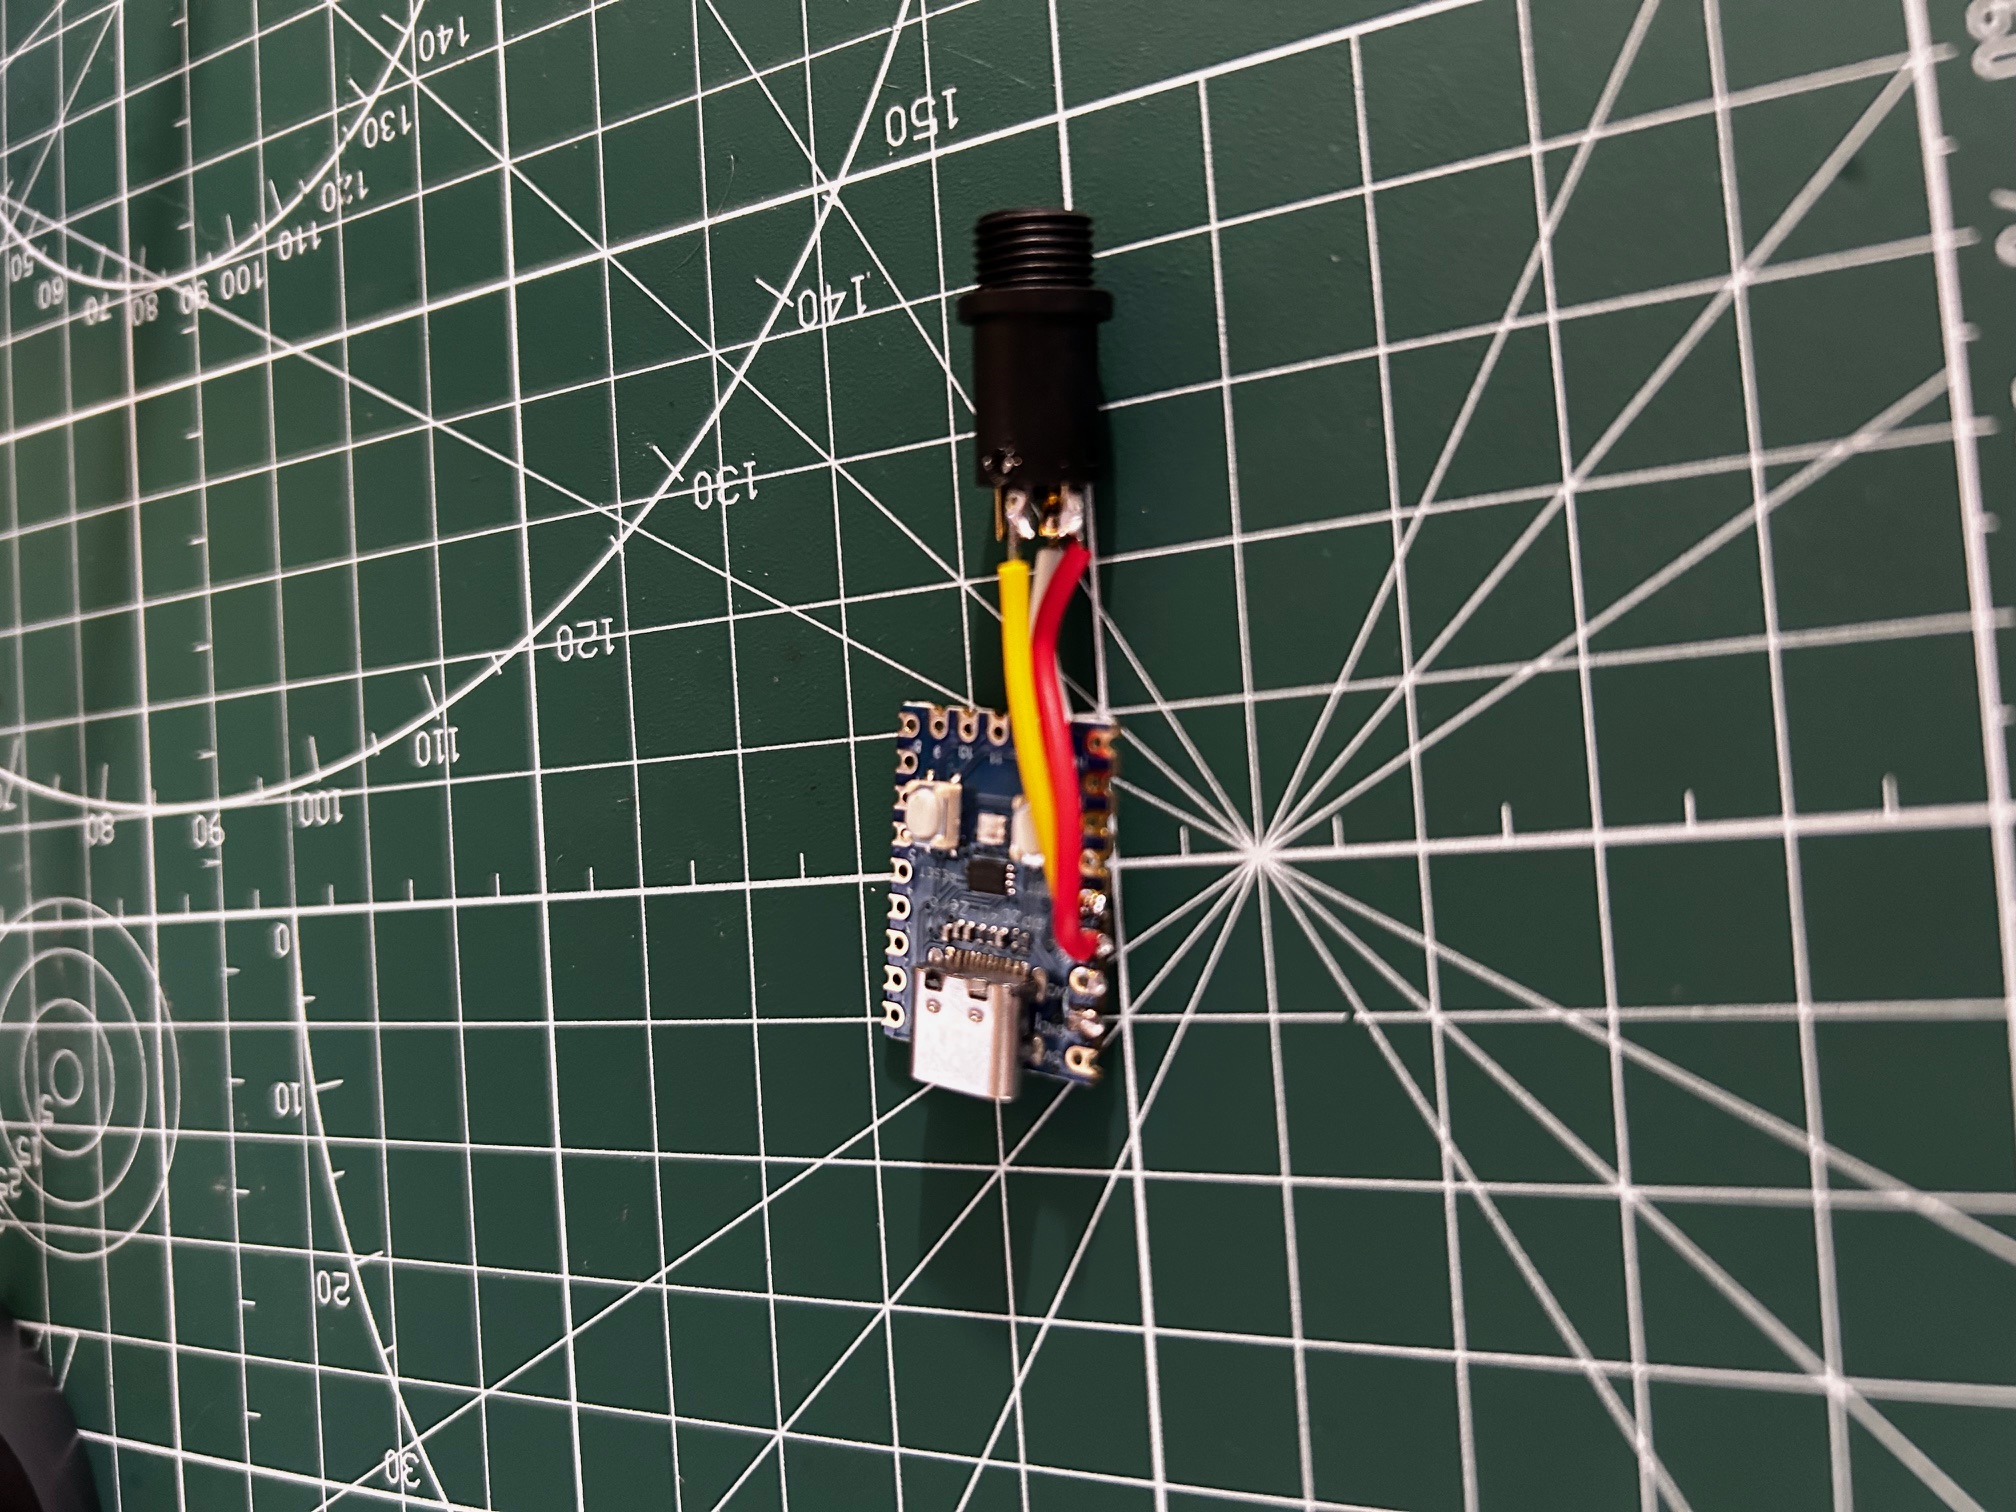
Looking at the Vail adapter’s code, I realized that all I needeed to do was to send a keypress when either a dit or dah was pressed on my paddle. I figured I could do that with a simple bit of my own code. First I wired a headphone jack to a spare RP2040 Zero board I had, so that way I could know which pin numbers to use. Then I programmed the board.
Here’s my wiring prowess:
Here is my code. You’ll need to install CircuitPython on your board if you want to use this for yourself, and add the adafruit_hid library to your lib folder.
import board
import digitalio
import time
import usb_hid
from adafruit_hid.keyboard import Keyboard
from adafruit_hid.keycode import Keycode

# Initialize the keyboard object
keyboard = Keyboard(usb_hid.devices)

# Set up the dit (dot) button on GPIO28
dit_pin = digitalio.DigitalInOut(board.GP28)  # Using GP28 for the Raspberry Pi Pico
dit_pin.direction = digitalio.Direction.INPUT
dit_pin.pull = digitalio.Pull.UP

# Set up the dah (dash) button on GPIO29
dah_pin = digitalio.DigitalInOut(board.GP29)  # Using GP29 for the Raspberry Pi Pico
dah_pin.direction = digitalio.Direction.INPUT
dah_pin.pull = digitalio.Pull.UP

# Track the previous state of each button
dit_pressed = False
dah_pressed = False

while True:
    # Check dit button (GPIO28) - active LOW (pressed when grounded)
    current_dit_pressed = not dit_pin.value
    if current_dit_pressed != dit_pressed:
        dit_pressed = current_dit_pressed
        if dit_pressed:
            # Button pressed - send left bracket key press
            keyboard.press(Keycode.LEFT_BRACKET)
        else:
            # Button released - send left bracket key release
            keyboard.release(Keycode.LEFT_BRACKET)

    # Check dah button (GPIO29) - active LOW (pressed when grounded)
    current_dah_pressed = not dah_pin.value
    if current_dah_pressed != dah_pressed:
        dah_pressed = current_dah_pressed
        if dah_pressed:
            # Button pressed - send right bracket key press
            keyboard.press(Keycode.RIGHT_BRACKET)
        else:
            # Button released - send right bracket key release
            keyboard.release(Keycode.RIGHT_BRACKET)

    # Small delay to prevent CPU from running at 100%
    time.sleep(0.005)  # 5ms wait as requested
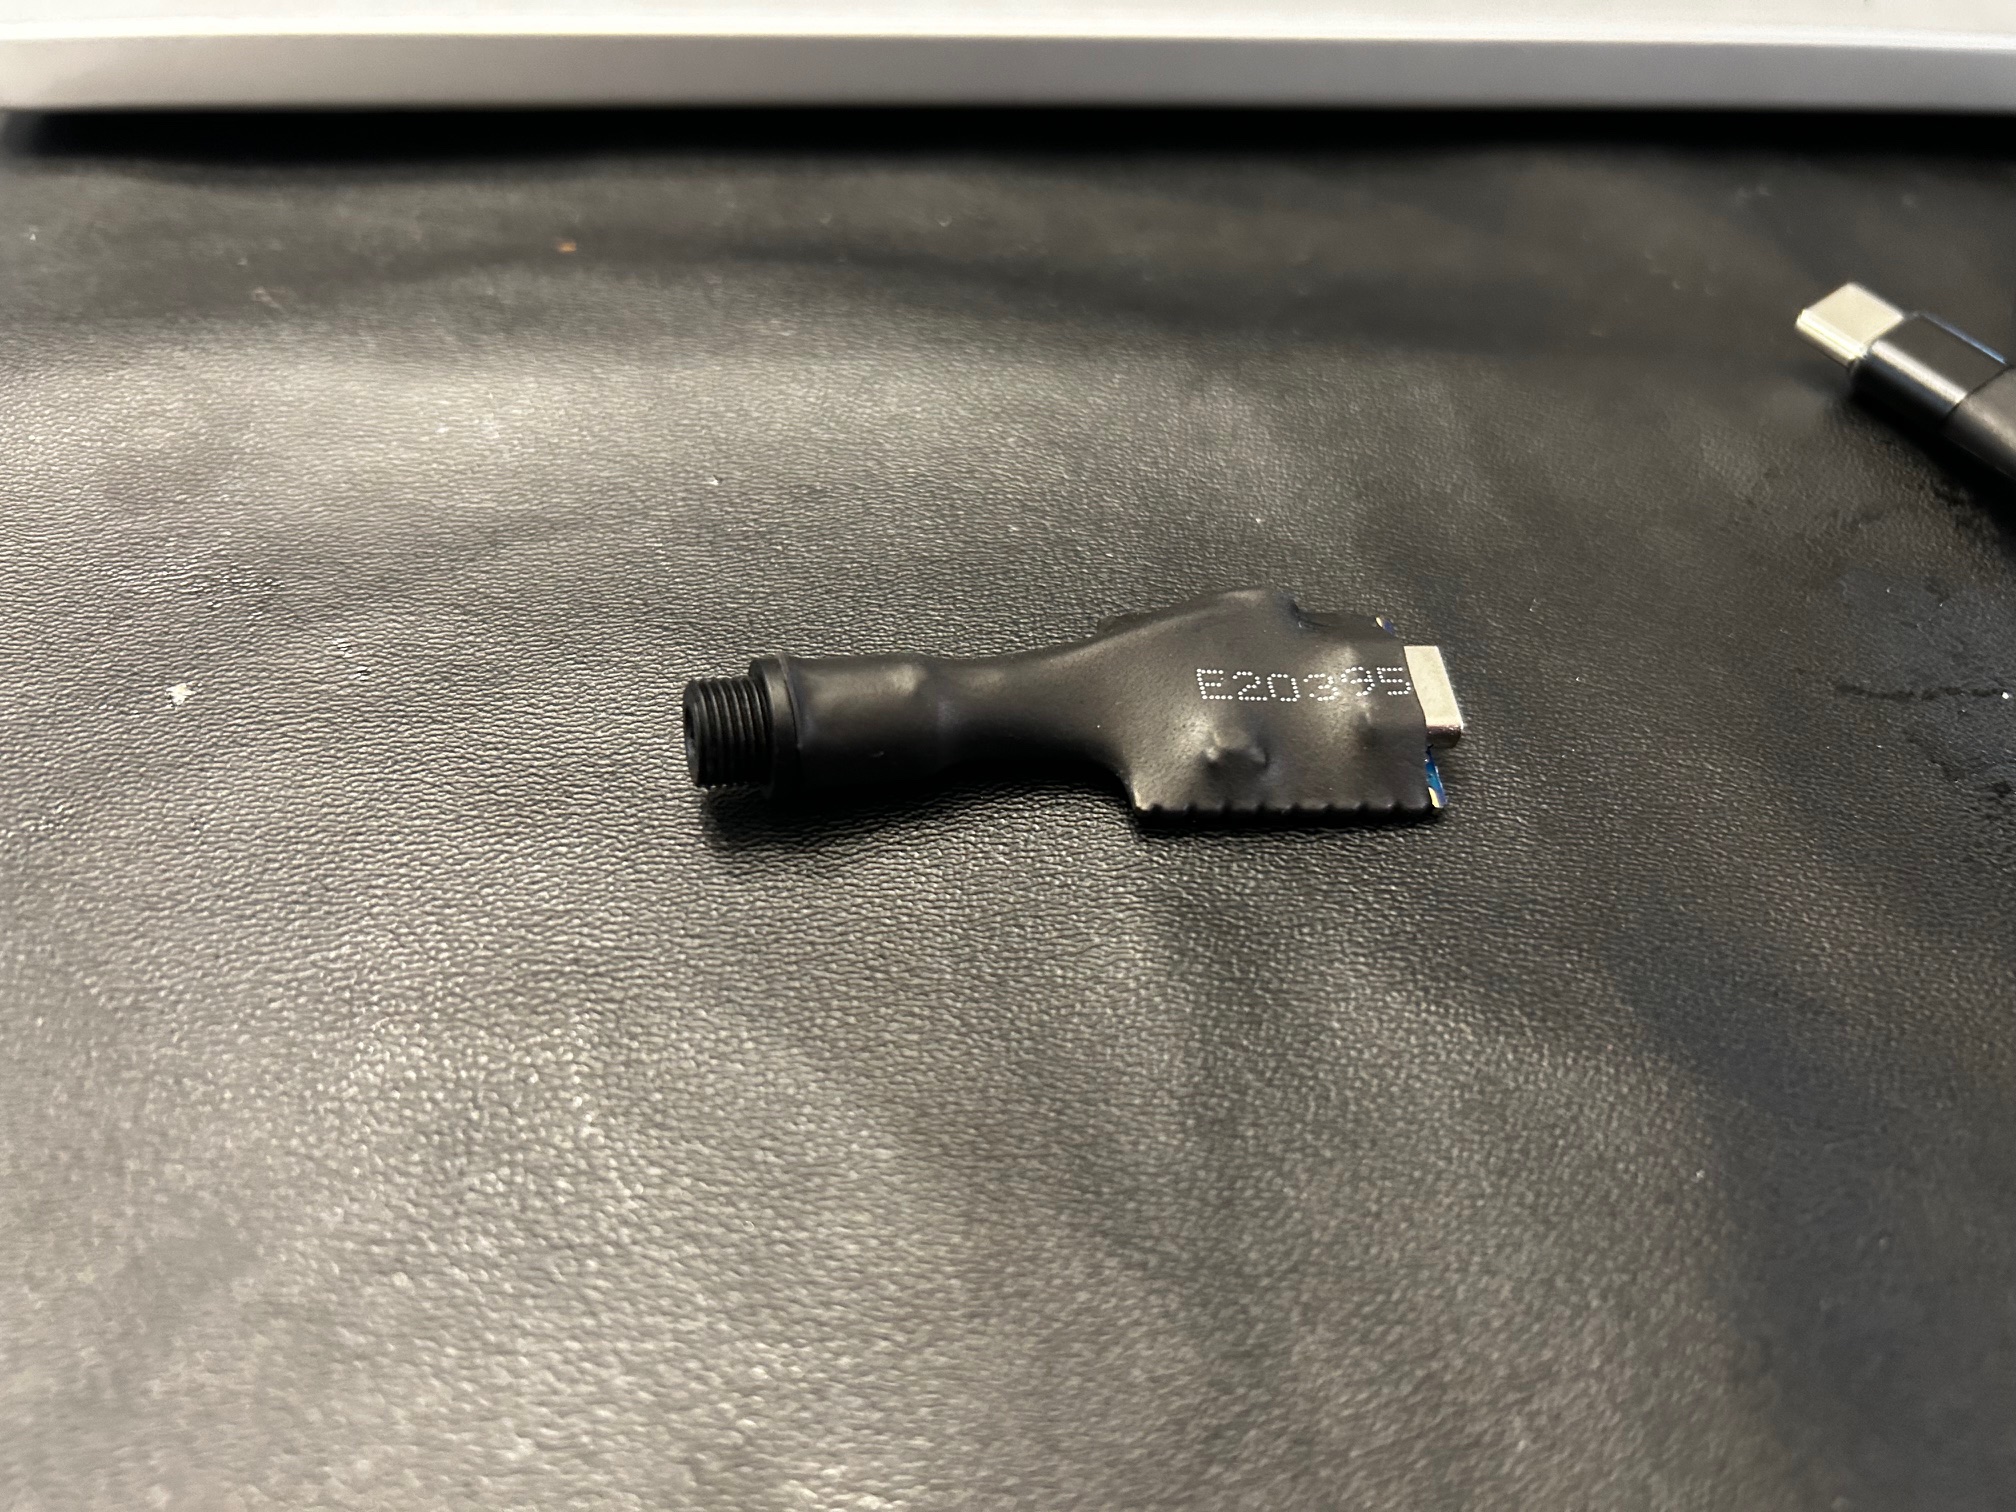
After that, I covered it up in some heat shrink to protect the soldered wires from bending too much:
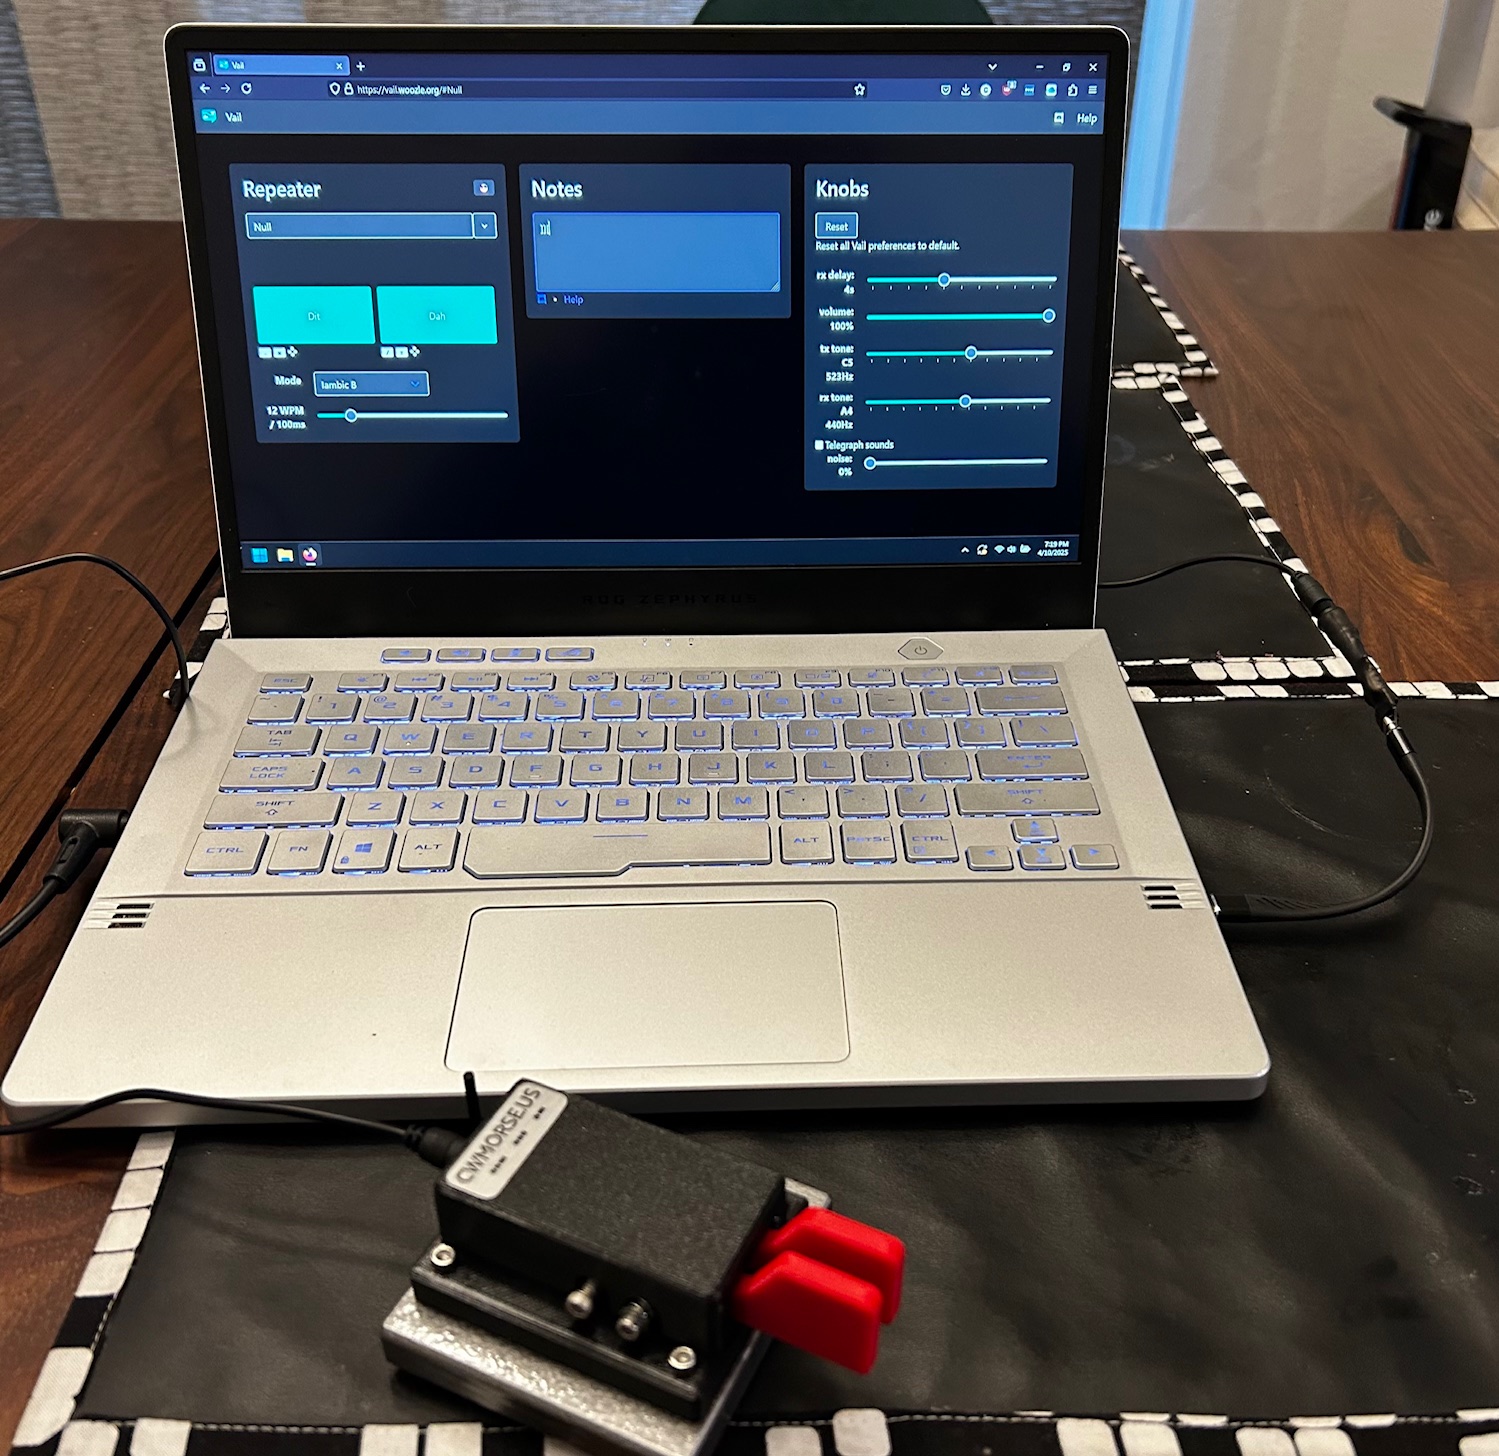
And I tested it on Vail. It works great! I know you can’t tell from the screen, but it works exactly as I would. There could be some improvements where I could make the adapter appear as a MIDI controller instead of a keyboard, and I may try that in the future, but this works fine for now. So I saved the cost of ordering an adapter from VBand. I may still donate to them in the future, but for now I have a low cost way to practice CW on the internet.